Collecting diagnostic information
If you encounter problems with the Web Signer application, you can enable logging and collect diagnostic information.
Microsoft Windows
Logging can be enabled by right-clicking the Web Signer application icon in the notification area of the taskbar and selecting the “Diagnostics > Enable logging” option.
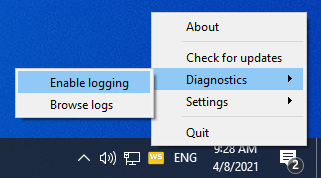
Logs are written to several files in a dedicated directory that is automatically created in the application data directory of the currently logged-on user. The contents of this directory can be displayed by selecting the “Diagnostics > Browse logs” option from the context menu.
Logging can be disabled by selecting the “Diagnostics > Disable logging” option from the context menu.
Apple macOS
Logging can be enabled by right-clicking the Web Signer application icon on the menu bar and selecting the “Diagnostics > Enable logging” option.
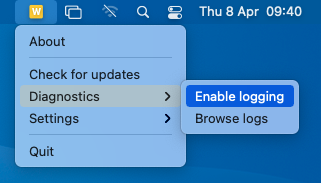
Logs are written to several files in a dedicated directory that is automatically created in the application data directory of the currently logged-on user. The contents of this directory can be displayed by selecting the “Diagnostics > Browse logs” option from the context menu.
Logging can be disabled by selecting the “Diagnostics > Disable logging” option from the context menu.
Linux
Logging can be enabled by right-clicking the Web Signer application icon on the menu bar and selecting the “Diagnostics > Enable logging” option.
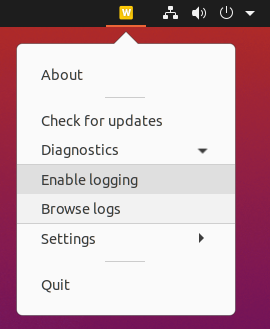
Logs are written to several files in a dedicated directory that is automatically created in the application data directory of the currently logged-on user. The contents of this directory can be displayed by selecting the “Diagnostics > Browse logs” option from the context menu.
Logging can be disabled by selecting the “Diagnostics > Disable logging” option from the context menu.